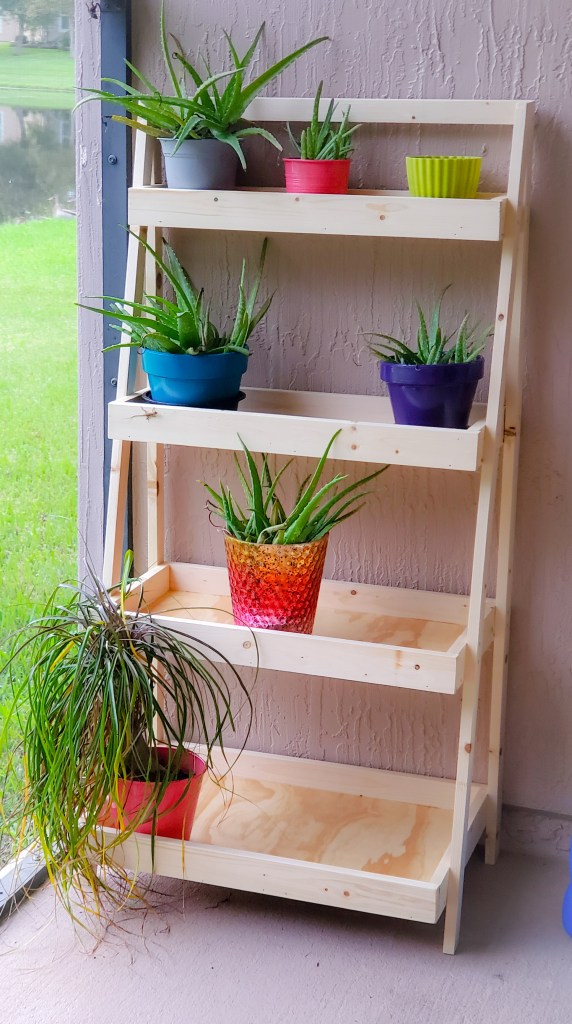
After building the outdoor sofa and tables, I needed one more thing to complete our patio space. Living in Florida at the time, we kept tons of plants in the screened patio that just ended up sitting on the ground and would make a mess when it rained. A planter tower became the next project! After searching and getting the wife’s approval for what she liked, I decided on building this using plans from Ana White’s Narrow Painter’s Ladder Shelf. Let’s jump right in!
I used Ana’s shopping and cut list with a few modifications. Instead of using 1x12s, I used 3/4″ inch plywood. If I would have been making this for inside use, I might have used the 1x12s, but I had the plywood readily available, thus making it a cheaper option and better suited for outside use in my opinion. I also doubled the width of the boxes to exactly 24″ to make it easier to rip the plywood. Her plans also utilize a brad nailer to attach the boxes to the frame. Since I don’t have one yet, I used 1-1/4″ inch screws in the place of brad nails.
Here is my cut list:
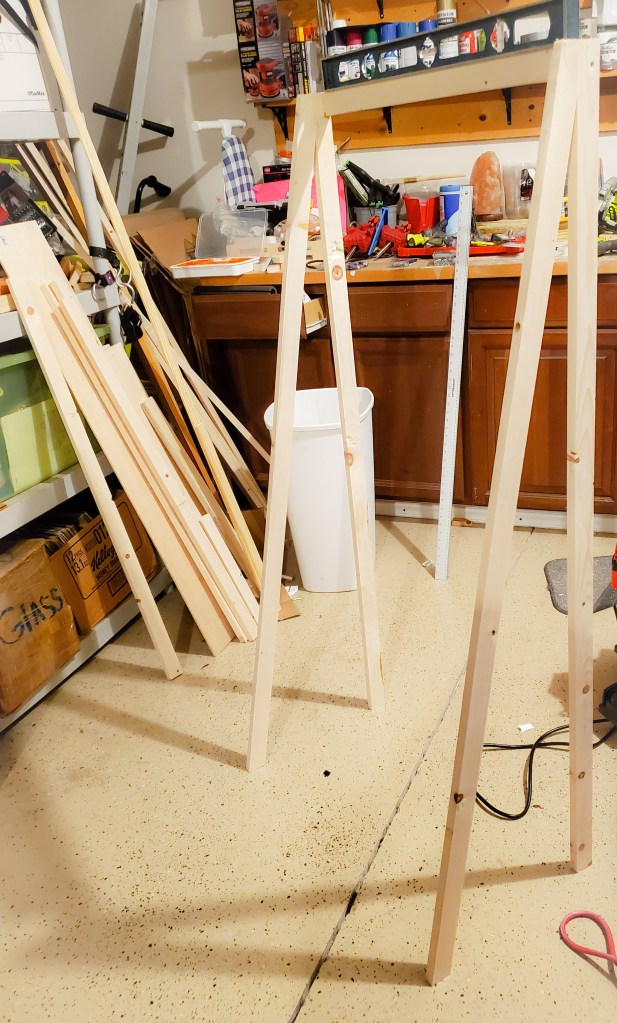
Ladder Frame
- 2 – 1×2 boards cut @ 55-3/8″ long (front legs, ends cut at 15 degrees off square)
- 2 – 1×2 boards cut @ 53-1/2″ long (back legs)
- 8 – 1×3 boards cut @ ~24- 3/4″ long – measure and cut to fit (fronts and backs of shelves)
- 1 – 1×3 board cut @ ~24-3/4″ long (top trim) – cut same length as the 8 1×3 boards
Shelves
- 1 – 3/4″ plywood ripped @ 24″ X 4-3/4″ (top shelf bottom)
- 2 – 1×3 boards cut @ 4 3/4″ long (top shelf side trim)
- 1 – 3/4″ plywood ripped @ 24″ X 8-1/2″ (second shelf bottom)
- 2 – 1×3 boards cut @ 8 1/2″ long (second shelf trim)
- 1 – 3/4″ plywood ripped @ 24″ X 12-1/4″ (third shelf bottom)
- 2 – 1×3 boards cut @12 1/4″ long (third shelf trim)
- 1 – 3/4″ plywood ripped @ 24″ X 16″ (bottom shelf bottom)
- 2 – 1×3 boards cut @ 16″ long (bottom shelf trim)
Once I got everything cut the most challenging part, full transparency, was getting the angle correct on the top of the front board. Both ends of that board are cut 15° off square and parallel. Then you make a 90° cut, 1 inch into the depth of the board. It’s really important to get these measurements correct so your frame is level and fit your boxes properly. Here is what the frame looked like:
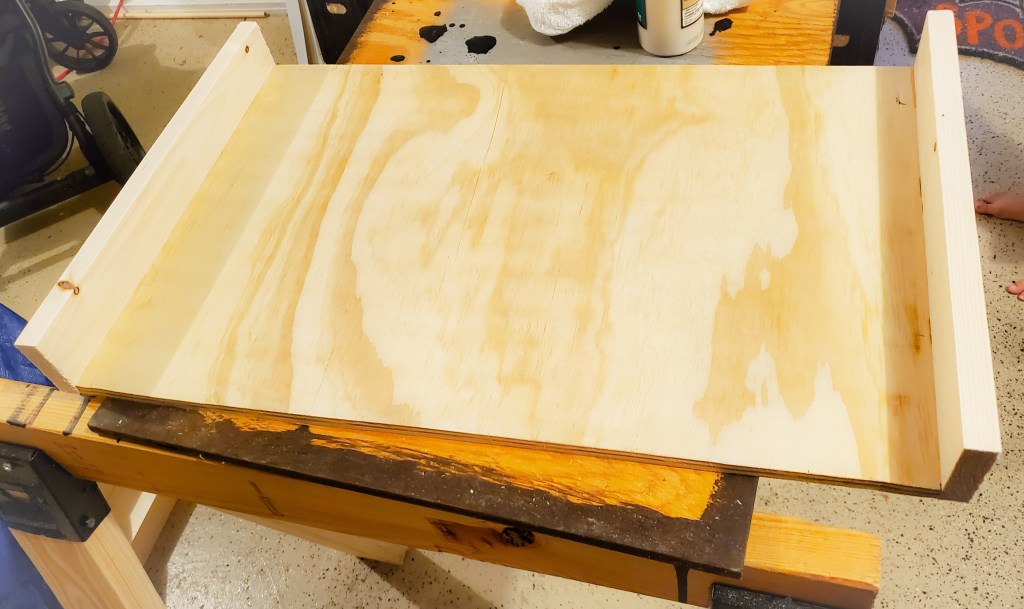
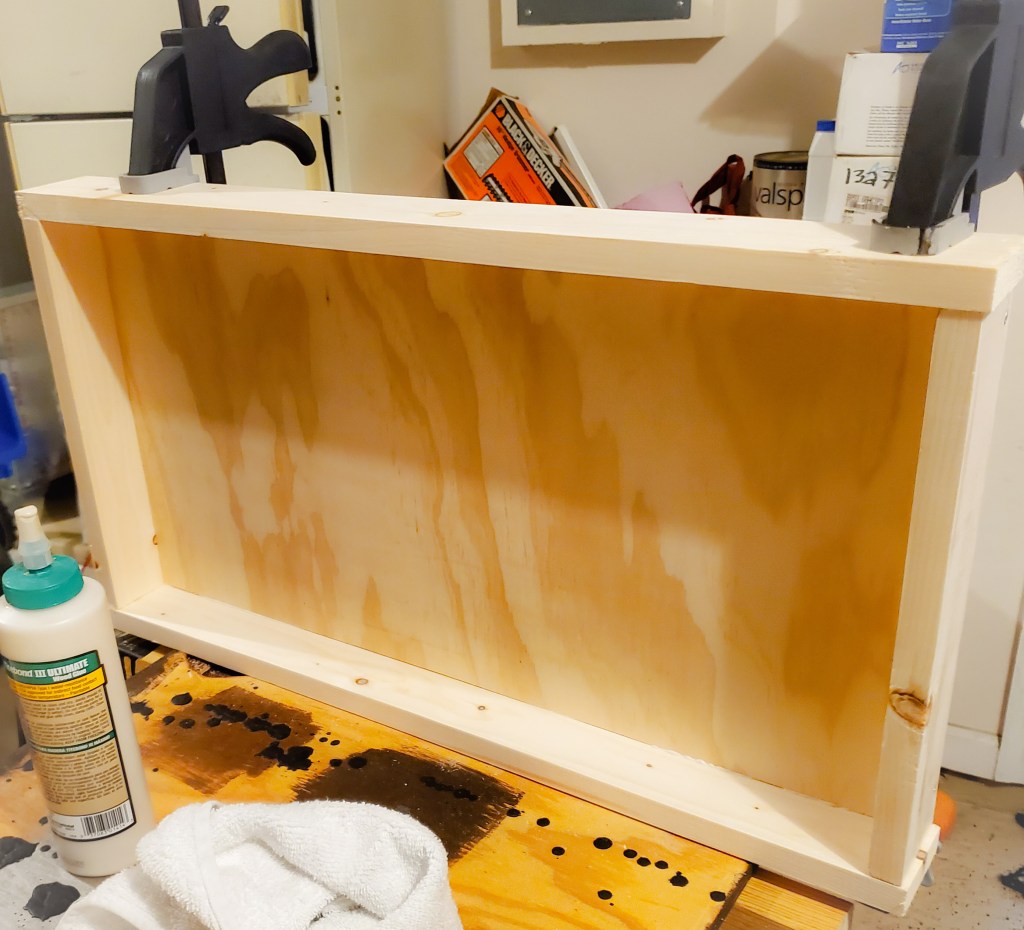
Next, I made all the boxes using 1-1/2″ wood screws and wood glue.
Then I laid the frame down on my garage floor to attach the shelves at the correct spots and ensure they were flush with the back framing board. I attached the boxes with 1 3/4″ screws.

After everything was attached and secured, I coated it with several layers of Olympic Waterguard Clear Waterproofing Sealer
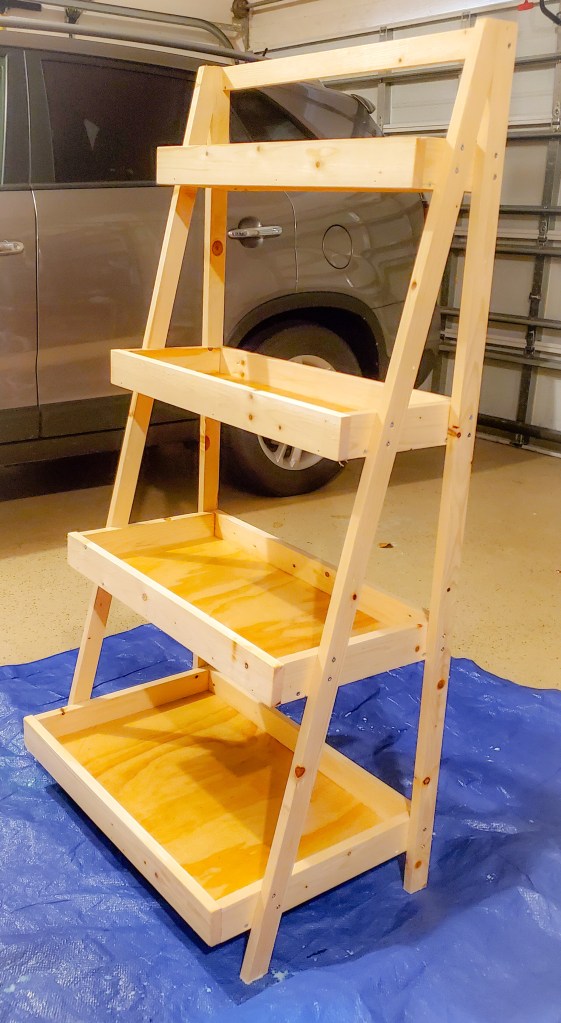
Here is the final product: