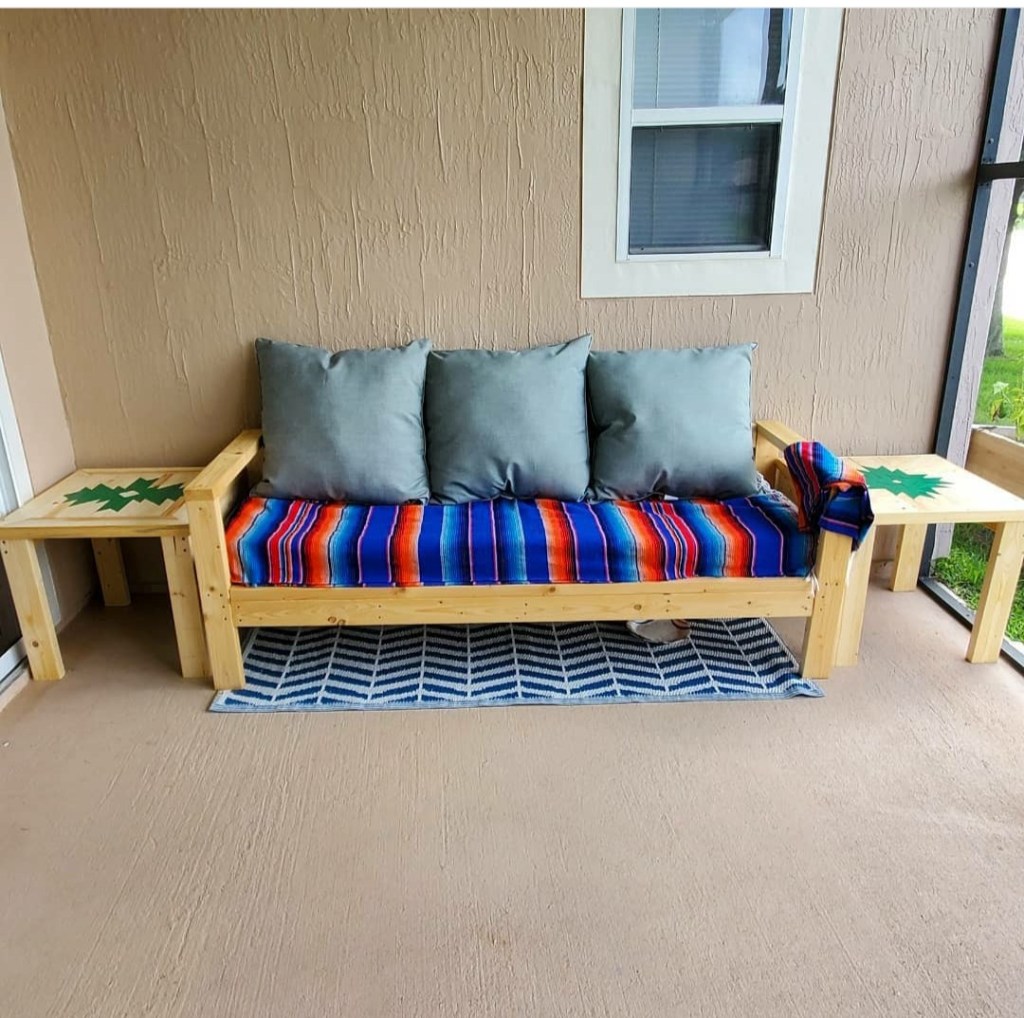
After the outdoor sofa was complete, we needed tables. First we decided on a theme and colors for the patio decor. The wife wanted beach theme (whomp whomp) and I wanted something bright and vibrant. We settled on Mexican Fiesta theme (talavera, sarape, etc) with all the bright colors. I had seen some different wood wall art in Pinterest and decided to do the tables with an Aztec design. I mean, why wouldn’t you go from a super basic 2×4 couch to a really intricate table design as a beginner???
After choosing 2 designs, I had to figure out what kind of wood to use. I saw many different types of wood used for the designs such as shims, lattice, etc. but I needed something a bit more sturdy. I knew the tables would be used by my toddler as another climbing toy, plus with it being outdoor tables, I knew they would undergo a bit more of a beating. I decided to use common board. Supplies for the project are as follows:
- 1/2in plywood – 2×2
- 1×2 common board
- 2x4s
- 1in lattice
- Wood glue
- Paint of your choice
- Waterproofer/sealer
- Brad nailer
- Miter saw
- Sander
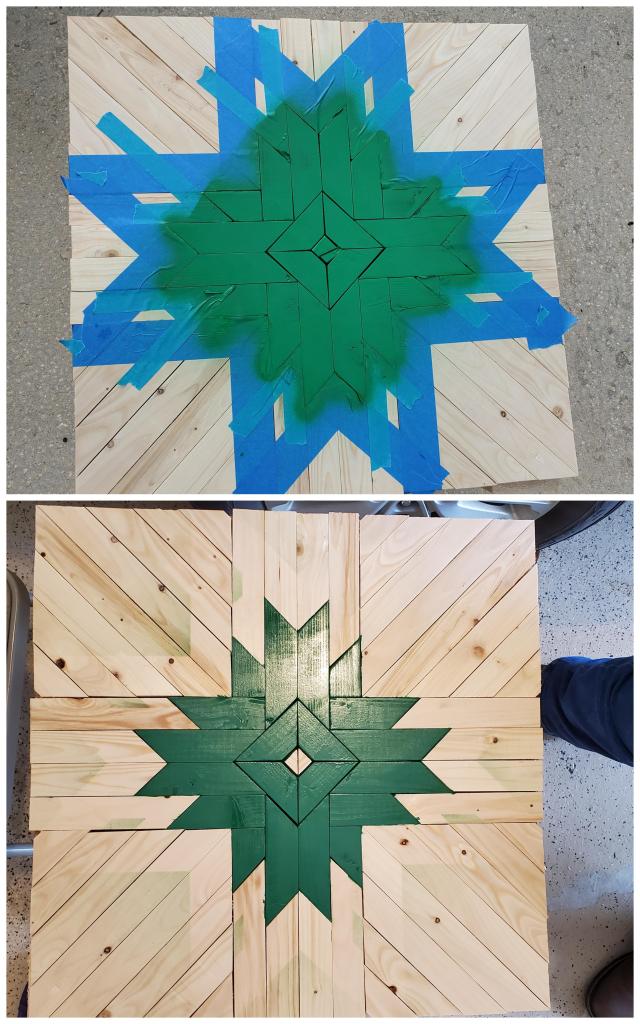
For the first table, I was so eager to get started that, to be quite honest, I made more difficult than it needed to be because I didn’t plan it out appropriately. I started with my center design, glued to to the plywood and then created the outside part of the design. In hindsight, I should have created the base of the table first, painted to design that needed to be painted and then attached it all. I also would have squared my plywood, but as a beginner, I didn’t think that the measurements of a 2×2 piece of plywood wouldn’t actually be 2×2. That made the measurements for the mitered pieces very frustrating! Here is a photo of the progress of the first table:
Since I didn’t paint the design before hand and had already chosen spray paint, I used painters tape to try to cover what I didn’t want painted. Hindsight again, outside of painting before assembly, I should have covered that I didn’t want painted, not only in tape, but with some other barrier like newspaper because the spray paint did get where I didn’t want it and I had to and it off. Pic below of the painting and residue it left:
After sanding off the green paint off the periphery of the design, I then built the base. I used some scrap 2x4s I had left over and then used 1in lattice board and brad nails around the edges to finish it.
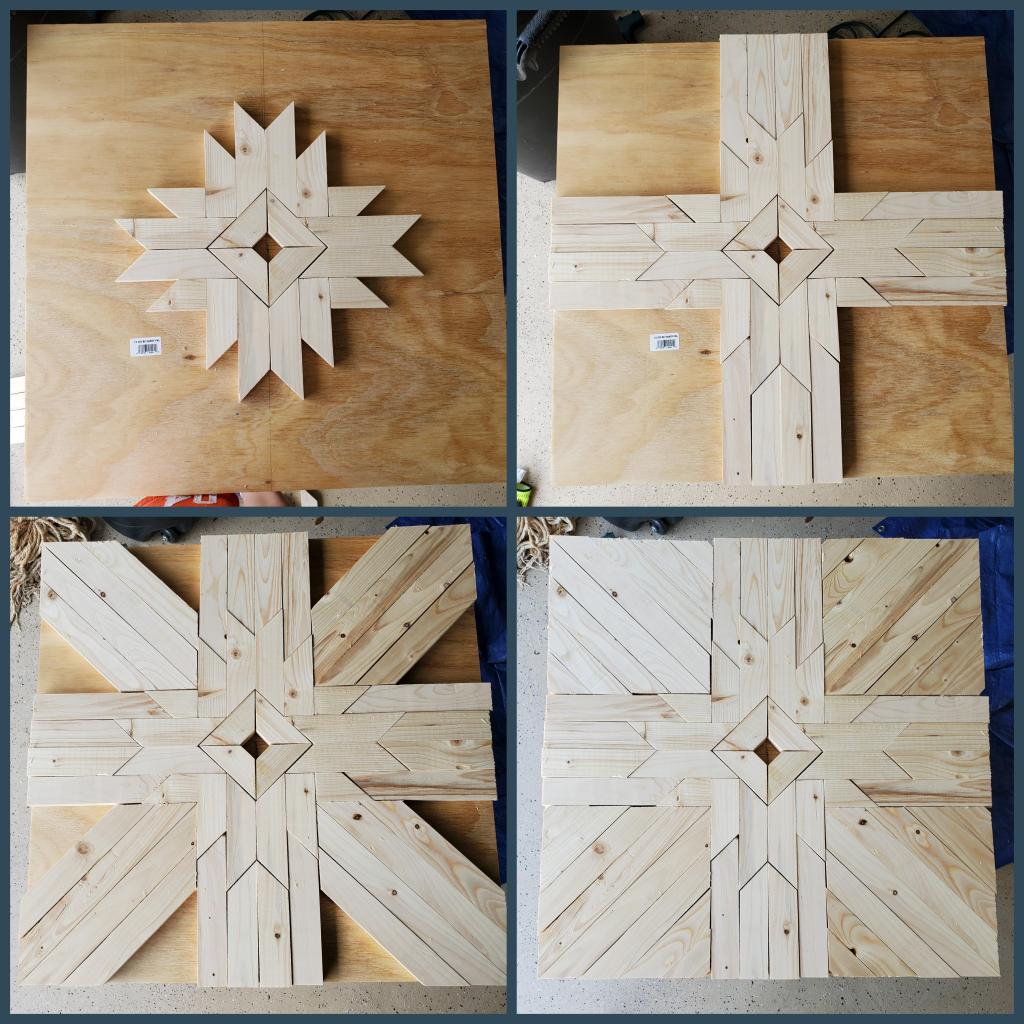
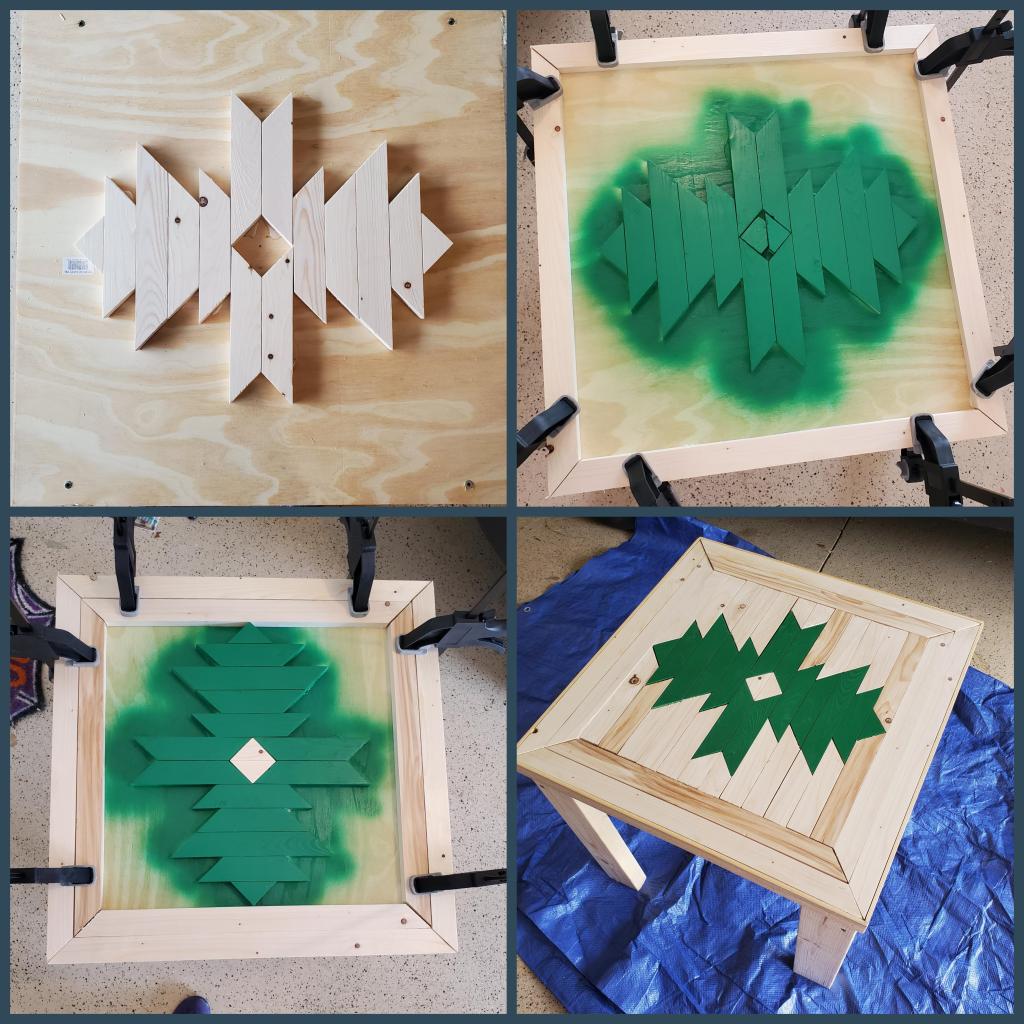
I then sealed with Olympic Waterguard Clear Wood Sealer and was done! The second table, I decided I definitely did not want to make it as complicated as the first and fixed most of the mistakes from the previous table. However, I still didn’t learn to square off the plywood, making my miters really frustrating! I did however paint build the base first and paint the design prior finishing the full table making completing it much faster! Here is the progress of the second table:
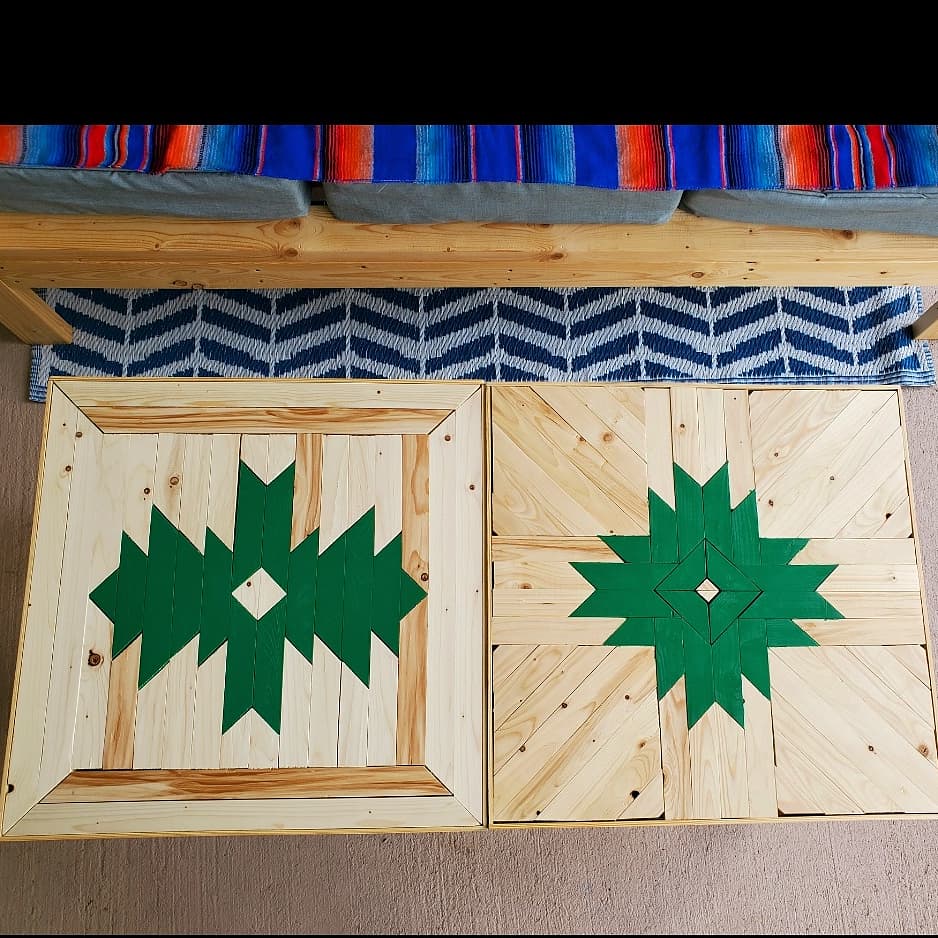
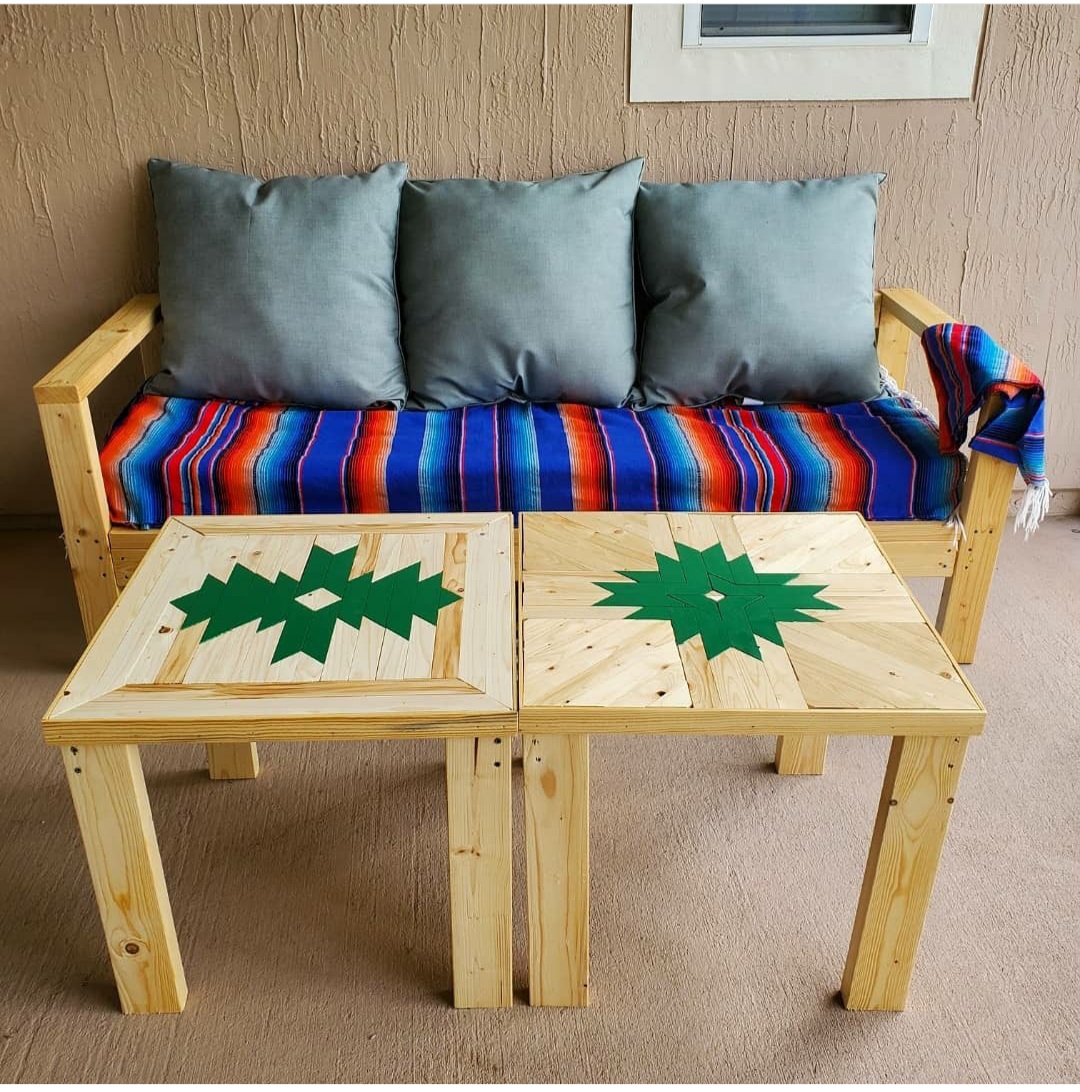
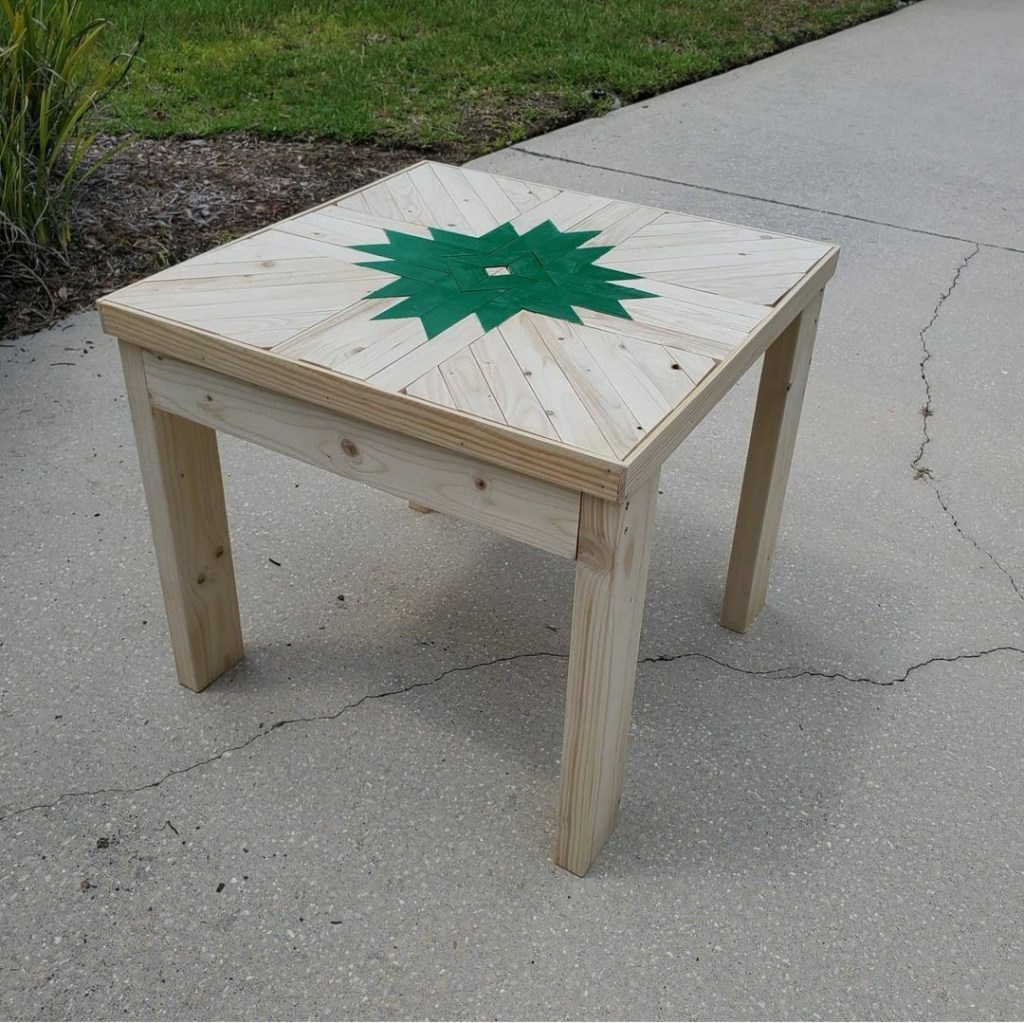
Here are a few pics of the finished table: